Welcome to your ultimate guide to the astounding world of home renovation! Embarking on this exciting journey can be both thrilling and overwhelming, but fear not because we’re here to walk you through the process week by week. From dreaming up your ideal space to the final finishing touches, we will outline the key milestones, challenges, and rewards awaiting you. So, fasten your seatbelts and get ready to transform your home into something truly extraordinary!
Setting the Stage – Weeks 1 and 2
Some of the most exciting and challenging phases of home renovation occur during the initial weeks. These early stages set the foundation for your project and lay the groundwork for what’s to come. During Weeks 1 and 2, you will focus on setting the stage for a successful renovation, finalizing plans and designs, acquiring necessary permits, and procuring the needed materials. Let’s dive into each of these critical tasks in more detail.
Finalizing Plans and Designs – Week 1
During the first week, it’s time to get your ideas down on paper and finalize the plans and designs for your renovation. This is the stage where you work closely with a designer or architect to ensure that your vision aligns with the practicalities of your space. You will discuss layout options, material choices, and any special features or requirements you have in mind. Taking inspiration from sources like the Kitchen Remodel Timeline & Tips can be incredibly helpful at this stage, giving you insights into how to streamline the process and make the most of your renovation.
Acquiring Permits and Material Procurement – Week 2
In the second week, you’ll shift your focus to acquiring the necessary permits and procuring the materials for your renovation. This stage involves submitting permit applications to the relevant authorities, which can take some time for approval. It’s essential to understand the specific requirements for your area to avoid any delays or complications. Additionally, you’ll want to begin sourcing the materials you’ll need for your project. Taking measurements and getting accurate estimates will help you determine the quantities required. Remember, it’s always better to overestimate than to be left scrambling for materials mid-renovation.
Throughout this process, staying organized and keeping track of all your documentation is crucial. Keep a folder or digital file with all necessary permits, receipts, and contact information for suppliers. This proactive approach will save you time, stress, and potential headaches.
Setting the stage for your home renovation may feel overwhelming, but breaking it down into manageable tasks will make it more approachable. By finalizing your plans and designs in Week 1 and acquiring permits and materials in Week 2, you are taking significant strides toward making your dream space a reality. Congratulations on completing these crucial steps, and prepare for the next exciting phase of your renovation journey!
The Real Execution – Week 3 to Week 6
Despite the excitement of starting your home renovation, it can also be overwhelming. Don’t worry, though! We’ve got you covered with a detailed timeline of what to expect during the next few weeks. You can also refer to the Construction timeline and stages of a NYC renovation to comprehensively understand the process.
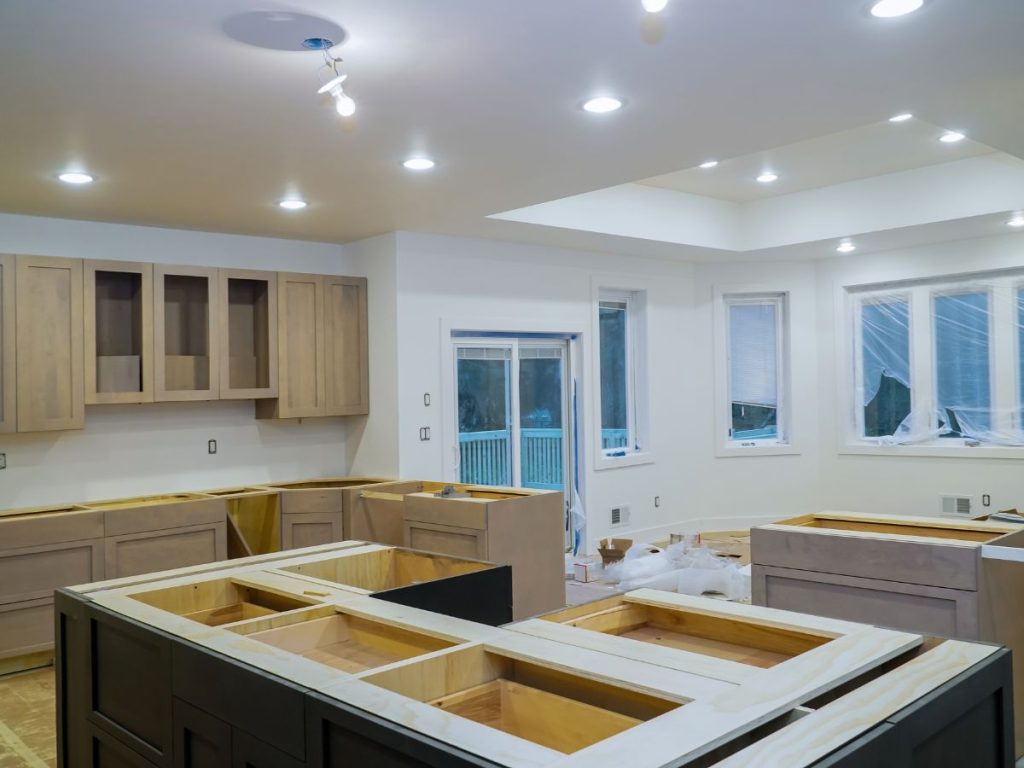
Starting with Demolition and Clean Up – Week 3
In week 3, the real action begins with the demolition and clean-up process. This is when you’ll see the transformation happening in your space. Walls, cabinets, and fixtures will be removed to create a blank canvas for your new design. It might get dusty and noisy, but the result will be worth it. Protect your valuables and keep children and pets away from the construction area. Remember to communicate with your contractor regularly to ensure everything goes according to plan.
Foundation and Framing Work – Week 4
Week 4 is when the foundation and framing work takes place. This is a crucial step that sets the foundation for your renovated space. The structural elements, such as beams and walls, will be installed to create a sturdy framework. Attention to this stage is essential, as mistakes can have long-term consequences. Make sure your contractor is experienced and follows all safety protocols. Your vision is taking shape now, and you can begin to visualize the final result.
Electricity, Plumbing, and HVAC – Week 5
Week 5 focuses on essential systems such as electricity, plumbing, and HVAC. This is when the wiring, pipes, and ventilation will be installed to ensure your new space is functional and comfortable. You’ll need to discuss your electrical and plumbing needs with your contractor to ensure all your requirements are met.
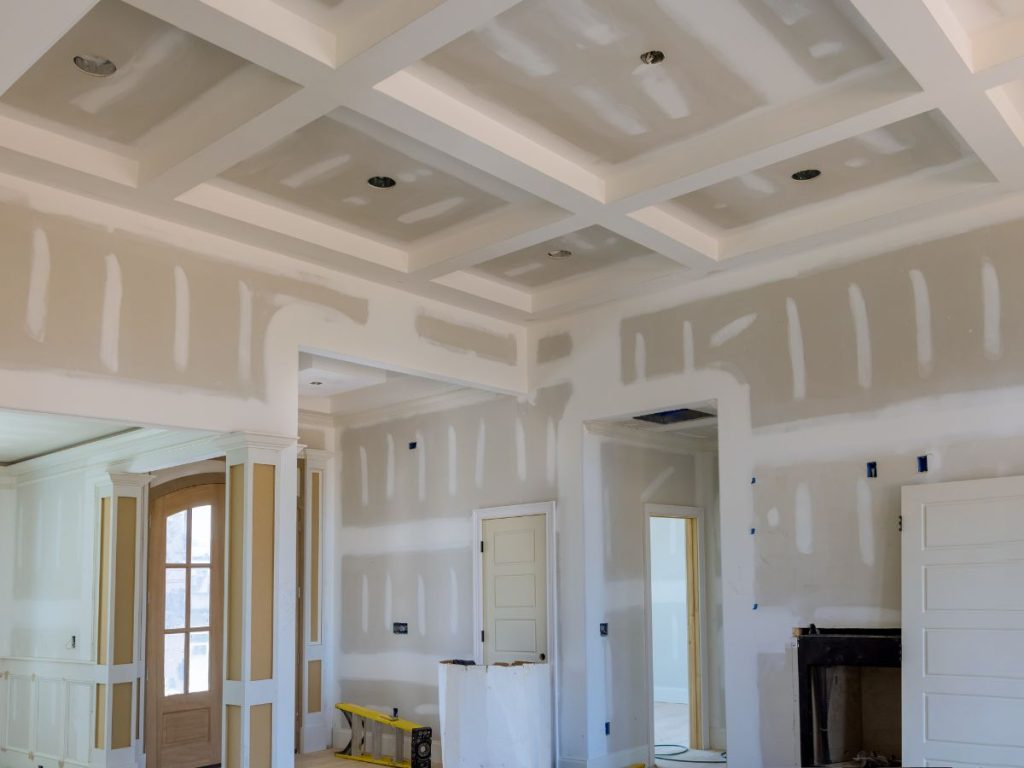
Installation of Drywall and Preliminary Flooring – Week 6
Week 6 brings us to the installation of drywall and preliminary flooring. Drywall is typically one of the last steps before the finished work begins. This is when you’ll see a significant visual transformation as the walls are closed and ready for paint or wallpaper. Preliminary flooring, such as subflooring or underlayment, will also be installed at this stage. It’s a milestone because it gives you a sense of how your finished space will look and feel. The progress is palpable now, and you can’t help but get excited about the final touches.
Remember, these are just broad timelines and can vary depending on the size and complexity of your renovation project. However, knowing these general phases will help you navigate the process more confidently. Stay connected with your contractor, ask questions, and remain engaged. You’re on your way to turning your house into the home of your dreams!


Finishing Up – Week 7 to Week 9
However, the end is finally in sight! Weeks 7 to 9 of your home renovation journey is about adding the finishing touches to your revamped space. This is the stage where you’ll see everything come together and transform your house into the home of your dreams.
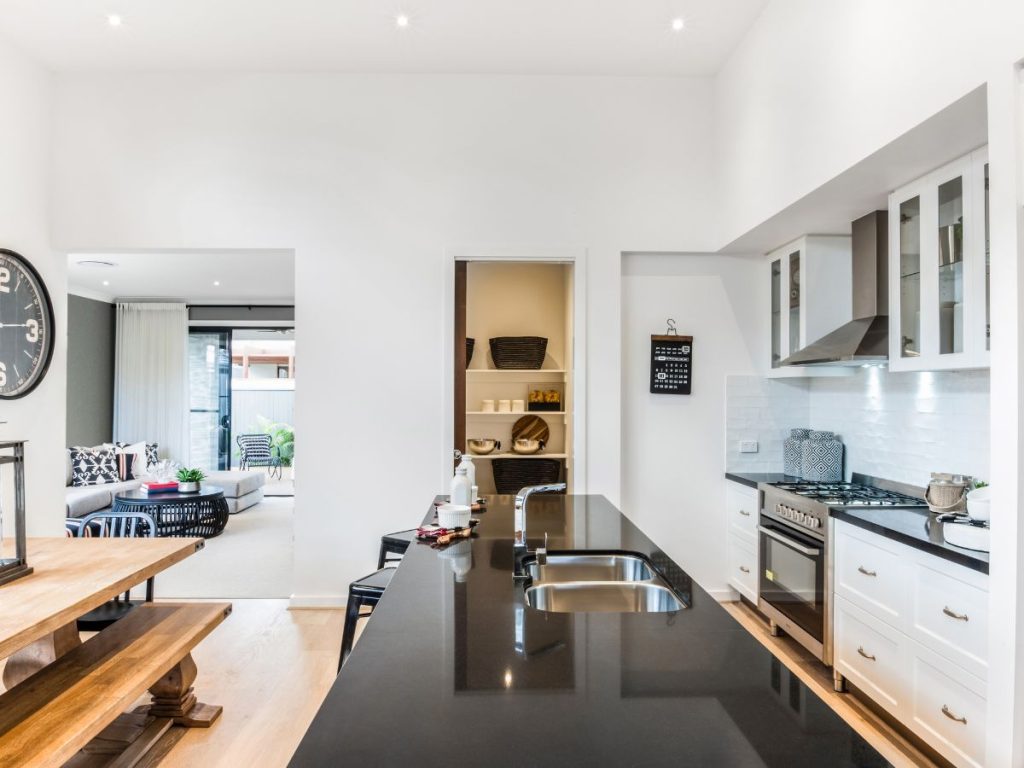
Painting and Installation of Flooring – Week 7
Now that the major construction work is done, it’s time to focus on the aesthetic aspects of your home. During Week 7, professional painters will apply fresh coats of paint to your walls, giving your space a vibrant and refreshed feel. This is also the week when your new flooring will be installed. Whether you’ve opted for hardwood, tile, or laminate, the new flooring will completely change the look and feel of each room. Be sure to keep pets and young children away from the work area to ensure their safety.
Fixtures and Appliances – Week 8
In Week 8, it’s time to add the final touches that will bring functionality and style to your renovated space. This is when fixtures such as faucets, light fixtures, and door handles will be installed. Additionally, major appliances like your stove, refrigerator, and dishwasher will be delivered and set up. Test all the appliances and fixtures to ensure they are in proper working condition, and double-check that they meet your expectations. This week, you’ll see your space transform into a fully functioning and beautiful home.
Final Touch-up and Cleaning – Week 9
Week 9 is all about the final touch-ups and ensuring that your renovated home is sparkling clean. Professionals will address any minor issues and make any necessary adjustments this week. They will also thoroughly clean your home from top to bottom, removing any construction dust or debris. This is the time to meticulously inspect every corner of your space and let your contractor know if anything requires additional attention. As exciting as it may be to finally move back into your newly renovated home, doing a final inspection and thorough cleaning will ensure that everything is perfect.
FAQ
Q: What is a typical timeline for a home renovation project?
A: The timeline for a home renovation project can vary depending on the scope and complexity of the project. However, as a general guideline, here’s what you can expect week by week:
Q: What happens during the first week of a home renovation?
A: During the first week of a home renovation, the focus is usually on planning and preparation. This includes meeting with your contractor, discussing your goals and expectations, and creating a detailed renovation plan. Your contractor may also thoroughly inspect the existing structure to identify any potential issues or challenges that need to be addressed.
Q: What typically occurs in the subsequent weeks of a home renovation?
A: Different tasks are typically completed each week as the renovation progresses. While this may vary depending on the project, here’s a general breakdown:
– Week 2-4: Demolition and removal of existing fixtures, walls, and flooring.
– Week 5-6: Rough electrical and plumbing work, including rewiring and rerouting if necessary.
– Week 7-8: Framing and drywall installation to create new partitions and walls.
– Week 9-10: Flooring installation (tiles, hardwood, carpet, etc.) and painting of walls and ceilings.
– Week 11-12: Install fixtures, such as cabinets, countertops, light fixtures, and plumbing fixtures.
– Week 13-14: Final touches, including trim work, cleaning, and any necessary touch-ups before project completion.
Remember that unexpected delays or changes to the project can also affect the timeline, so it’s essential to have open communication with your contractor throughout the process.